
Supplies:
*computer with Word program (or something like that)
*printer
*Heat n Bond Lite
*iron
*pencil
*fabric
*sewing machine stuff (applique foot if possible)
First I suggest you find a friend with a short name. :)
First I suggest you find a friend with a short name. :)
1- Type the name/word in the desired font on the computer. This is French Script at 375 point font. To increase the font from the sizes on the pull-down menu, just highlight it and right click on "font". Then type your number in the little box.
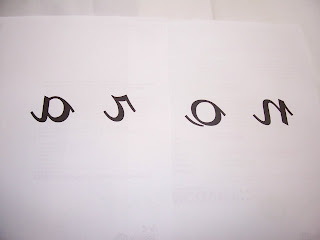 2- Print the mirror image (or sometimes called transparency setting) so that the letters print out backward. Not so important if it's a non-directinal design, but with letters it's big deal. So print 'em backwards!
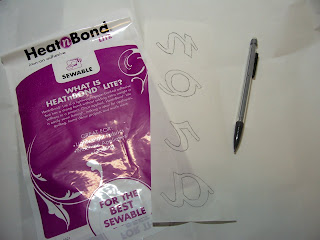
3- Trace the backwards print out onto the paper side of the Heat n Bond. There's a bumpy side and paper side.
 4- Cut out around letters giving yourself some space. See above where there's a good inch or so around the letter.
5- Place these letter squares on appropriatly-sized fabric scraps. Check your placement to make sure it's all where you want it to be.
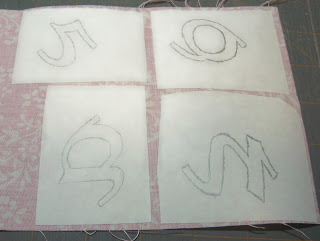
6- Iron the squares (rough side down) onto the BACK of the fabric. You're essentially making fabric stickers here. The rough side of the Heat n Bond creates a sticky back for the fabric.
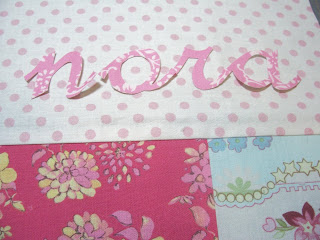 7- Cut out around the pencil lines to reveal some sweet-looking letters!
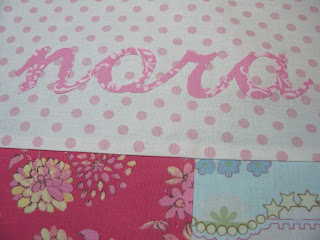
10- At this point you can be done but if you like to make it fray-proof and longer-lasting, sew around the letters using an applique foot and blanket stitch. I've included a picture of an applique foot. It looks pretty normal except has a clear/wide hole where you can see exactly what's going on while the machine is sewing.
7- Cut out around the pencil lines to reveal some sweet-looking letters!8- Places the letters on the background fabric, play with the placement and make sure it's all good.
9- When you are happy with where they should go, peel the paper off the back. I usually do this at the ironing board with the iron hot and ready. Make sure your placement is good again and then when you're totally sure - iron it down. No steaming is necessary and it really takes about 5-10 seconds.
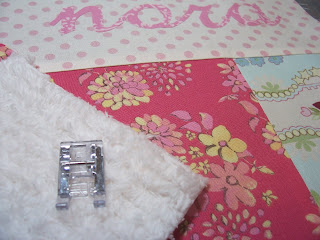
10- At this point you can be done but if you like to make it fray-proof and longer-lasting, sew around the letters using an applique foot and blanket stitch. I've included a picture of an applique foot. It looks pretty normal except has a clear/wide hole where you can see exactly what's going on while the machine is sewing.
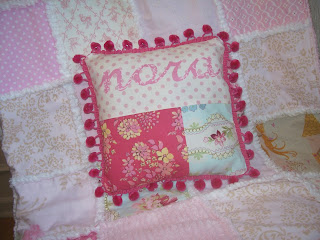
Finish up your little project after those 10 easy applique steps. Nice work! You can show those Frenchy-accent words who's boss now.
You did a great job on this tutorial. I'm going to link to it. Thanks!
ReplyDeleteThis is a fantastic idea.. i'm going to make some with my daughters names on them .. Thanks!!!!!
ReplyDeleteholaa pasate por mi blog.
ReplyDeletewww.siempreconcarpediem.blogspot.com
Love, love, love the pillow. And I never knew there was such a thing as an applique foot.
ReplyDeletemust find the applique foot!
ReplyDeleteI can do this!