Hi everyone! Happy New Year! Is it ok to still say that?
How are your resolutions going? My resolution (I try to only make one and only one) for 2010 was to do better at meal planning. I wasn't doing it AT ALL, so I figured I could only improve. I'm happy to say that I really did get in the groove. I started out hard core and gained weight + spent more money. Then started to fizzle out but in the end I found a method that worked for me - a loose plan - and I think I found the winning combination.
Anyhoo my resolution for 2011 is.... to make my own laundry detergent! Apparently you can do it easily and spend approximately $10 a year. Good news since we are about to become a family of 5 and have laundry come out the ying yang. Haven't made any yet but you'll be sure to know when and how and all the good stuff.
So - I've had some rag quilt questions over on
flickr and on my Janome Yahoo group this week. Since I'm in the middle of making eleventy million of them, I figured it was time to get some words and pictures together from my little sewing nook.
Supplies:
*Fabric (Can be various scraps or charm packs. Don't put a charm pack through the wash. It will disappear.)
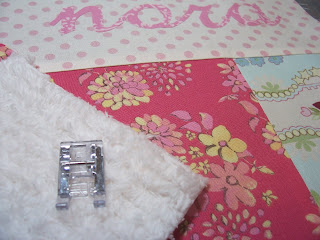
*Flannel ( I usually use white but you can get creative with the color. Also pre-shrink flannel - wash and dry.)
*Walking foot is nice for the sewing machine (not necessary, but makes sewing through alllll those layers easier)
*Spring-loaded scissors (Kinda actually necessary so you don't get hand paralysis and quit before the quilt is done)
This is perfect for beginners, even children, making their first quilt. It's great for instant gratification and quick results. I love rag quilts!
I was all set to make my my girls a fun little Dr. Seuss rag quilt for the play room/reading corner but my oldest daugther became horribly terrified of The Cat in the Hat this summer.

Hmm... Can't say that I blame her. But the rest of the fabric is bright, colorful, fun, and totally great.
The first thing you do is cut your fabric into squares. Totally doesn't matter what size. I usually do mine at 6" because I have a 6" ruler and it goes faster. Keep in mind that you will lose 1-2" after they are all sewn together so you might want to keep them on the bigger side.

Next is decision time. You must decide before you start sewing if you want your backing to be patchwork like the front (only without the raggy edges) OR a seperate back that you attach when it's all done. Should you go the patchwork route, you should stack 1 each of:
1- fabric (face down)
2- flannel
3- fabric (face up)
Next: sew a big X corner to corner on each little fabric/flannel/fabric sandwich to keep everything even steven - picture below.

Patchwork back identical to the front

See my X
So after you cut the fabric and flannel both the same size, it is time to sew! If making and attaching the back seperately, take a flannel square and place a fabric square on top (face up). You can sew an X across each block to keep everything centered or you can just wing it.
For most quilters it seems a little bit nutso at first because you are sewing WRONG sides together instead of right sides together as we usually do.
Another bit of important info - make your seam allowances about 1/2". It must be bigger than 1/4" so you have room to snip without cutting into the seam. Some people go much wider than 1/2" and that's fine, the raggy edges will be more floppy. I like to keep mine in check so I keep it on the small side.

Two blocks sewn together (flannel squares underneath) and the seam is exposed.

Do a row like this until all horizontal rows are done and then join the rows together one at a time until the front (and back too perhaps) is complete.

Here's a picture of what a cross-section would look like. I try to open up the seams as my walking foot plows through.

Now that your front is complete, make sure to have a fantastic pair of spring-loaded scissors . These are not the particular ones that I have but I'm sure they're fine. Put on a nice long movie, get comfy on the couch, and start snipping all those exposed seams at about 1/2" to 1/4" from each other. Sometimes it takes a few days to do, but that's ok. It's a great project to take in the car or waiting for your kiddos at dance. (Good conversation starter too, BTW.)
If making the identical patchwork backing, be sure to sew around the perimeter of the quilt and also snip around the outer edges.
If making a seperate backing, cut it the same size as your quilt and sew right sides together (backing and quilt), leaving a little opening (4-5") for turning. Be sure to backstitch at the beginning and end.
Now turn right sides out, use a ruler or something kind of sharp to poke out the corners, but don't puncture it in all your square-quilt madness.
Edgestitch all the way around (1/8" or so) making sure to close the opening you just used for turning.
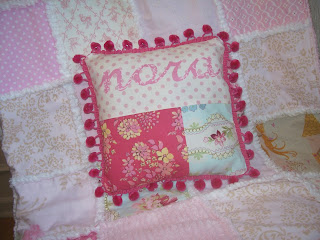
Once they are all snipped throw that puppy in the laundry, wash and dry. Do be aware that there is some crazy lint going on the first few washes so maybe do it with a load of towels or something. But oooooh, you will be in love when it comes out of the dryer. Crazy soft and super duper nice to cuddle with.
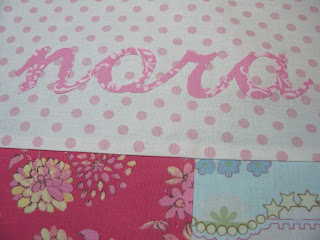
Up next... the back of the Dr. Seuss quilt. I have a little crash course in applique for ya'll.
I'd love to hear if this was helpful at all. And of course, I love to see pictures of what you make! Always feel free to ask questions, that's why I'm here. Thanks for stopping by!

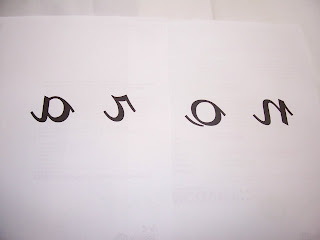 2- Print the mirror image (or sometimes called transparency setting) so that the letters print out backward. Not so important if it's a non-directinal design, but with letters it's big deal. So print 'em backwards!
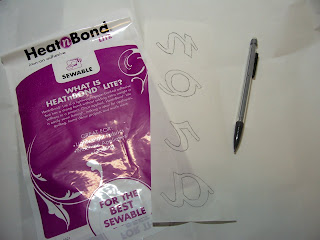
 4- Cut out around letters giving yourself some space. See above where there's a good inch or so around the letter.
 7- Cut out around the pencil lines to reveal some sweet-looking letters!
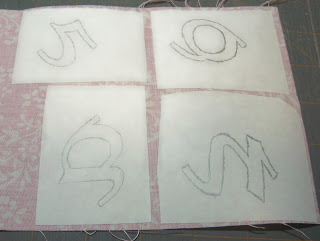